Error Handling In UiPath: TryCatch & RetryScope

Introduction
Error handling is a crucial aspect of building robust and reliable automation workflows in UiPath. One of the key techniques for handling exceptions is using the try-catch block. In this blog article, we will explore the power of the try-catch mechanism in UiPath and how it can help you gracefully handle errors and exceptions.
Understanding TryCatch Block
What is a Try-Catch Block?
In UiPath, a try-catch-finally block is a programming construct used to handle exceptions or errors that may occur during the execution of activities within a workflow, while also ensuring specific cleanup or finalization actions are performed regardless of whether an exception occurred or not.
The try-catch-finally block in UiPath follows the following structure:
- Try Block:
The try block contains the activities that you want to execute. It is the section where you anticipate that an exception may occur. If an exception occurs within this block, the execution of activities is immediately transferred to the catch block. - Catch Block:
The catch block is where you define the actions to be taken when an exception is caught. It specifies the exception type that you want to catch and handle. If an exception occurs in the try block that matches the specified exception type, the catch block is executed. Here, you can include activities to handle the exception, such as logging the error, displaying a message to the user, or performing any other necessary actions. - Finally Block:
The finally block is optional and comes after the try-catch block. It contains the activities that will be executed regardless of whether an exception occurred or not. The finally block is useful for performing cleanup tasks, releasing resources, or finalizing actions that should always be executed, such as closing database connections or releasing file handles.
In UiPath, you can use the “Try Catch” activity to implement the try-catch-finally block within your workflows. This activity provides a visual representation of the try-catch-finally structure and allows you to configure the activities within the try, catch, and finally blocks.
By utilizing try-catch-finally blocks in UiPath, you can effectively handle exceptions that occur during the execution of your automation workflows while ensuring that essential cleanup or finalization actions are performed. This helps in building robust and reliable automation processes by gracefully managing errors and ensuring the integrity of your workflow execution.
How Does the Try-Catch Block Work?
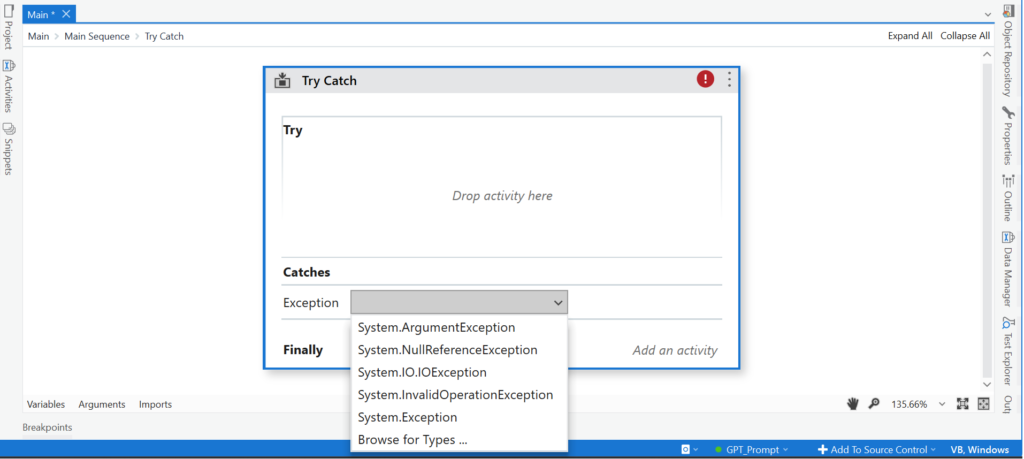
The Try-Catch activity contains three main sections:
- Try that holds the activity or set of activities that could throw an exception.
- Catches to indicate the exception type and, optionally, hold an activity or set of activities that’ll be executed when the specified exception is thrown.
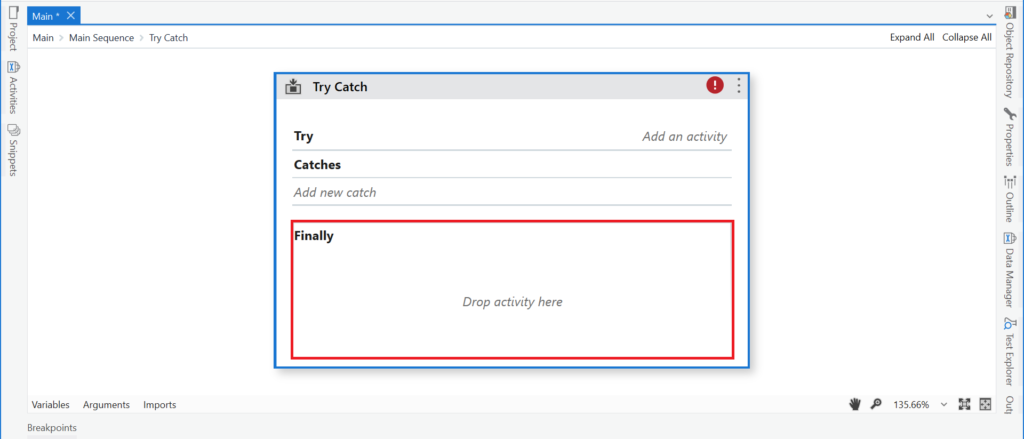
- Finally, holds an activity or set of activities that’ll always be executed.
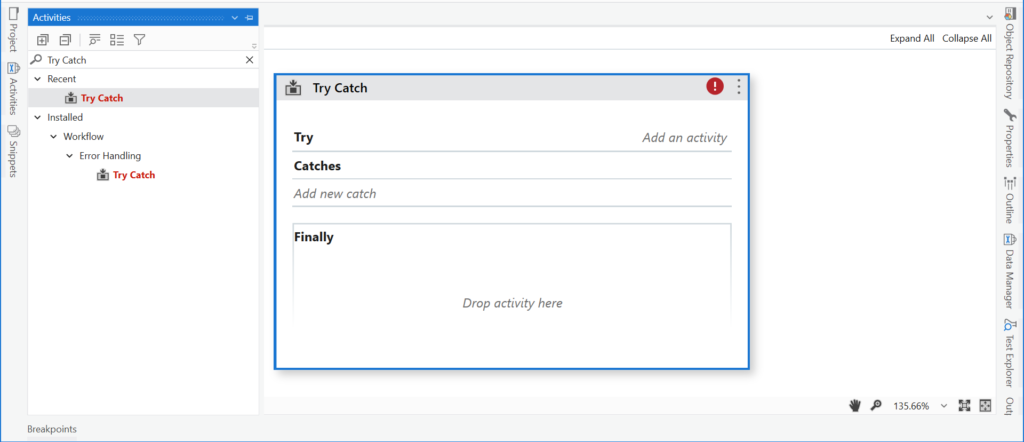
TryCatch Block can be activated or invoked from Activity Panel or Using the shortcut key ( Ctrl + T ).
Try – the activity or sequence of activities performed which has a chance of throwing an error.

Catches – the activity or set of activities to be performed when an error occurs. Here you must select the exception type to look for.
Finally – the activity or set of activities to be performed after the Try and Catches blocks are executed regardless of the result, which means it’ll be executed if an error is caught or no errors occur.
Exception Type In UiPath
In UiPath, exceptions are categorized into various types based on the nature of the error or unexpected behavior that occurred during the execution of activities. These exception types help you identify and handle specific errors more effectively. Here are some commonly encountered exception types in UiPath:
- System.Exception
The System.The exception is the most generic exception type in UiPath. It represents any type of exception that can occur during the execution of activities. Catching this exception type allows you to handle any unexpected error that is not covered by more specific exception types. - System.ApplicationException
The System.ApplicationException is a subclass of System. Exception. It represents exceptions that are specific to the application or workflow being executed. You can use this exception type when creating custom exceptions for your workflows. - System.ArgumentException
The System.ArgumentException is thrown when an invalid argument or parameter is passed to a method or activity. It indicates that one or more arguments provided to an activity do not meet the required conditions or are not in the expected format. - System.NullReferenceException
The System.NullReferenceException occurs when an attempt is made to access or manipulate an object that is null (not initialized) or does not exist. This exception is commonly encountered when working with variables, objects, or activities that have not been properly initialized or assigned a value. - System.IO.IOException
The System.IO.IOException is thrown when an error occurs while performing input/output operations, such as reading or writing files. It can indicate issues like file not found, permission denied, or an invalid file format. - System.DataException
The System.DataException represents exceptions that occur while working with data, such as errors in database operations, data retrieval, or data manipulation activities. - System.WebException
The System.WebException is specific to web-related activities. It represents exceptions that occur during HTTP requests, web API calls, or web scraping operations.
These are just a few examples of exception types you may encounter in UiPath. UiPath also provides additional specific exception types for activities related to Excel, email, database operations, and more. By catching specific exception types, you can handle errors more precisely and implement appropriate error-handling actions based on the nature of the encountered exceptions.
Implementing Try-Catch in UiPath
Dragging and Dropping the Try Catch Activity
- Step 1: Open UiPath Studio and create a new or open an existing workflow.
- Step 2: In the Activities panel, which is usually located on the left side of the Studio interface, search for the “Try Catch” activity. You can either scroll through the activities or use the search bar to find them quickly. You can use the shortcut key (Ctrl + T) or Left click and choose the option Try Catch.
Writing Activities within the Try Block
By writing activities within the “Try” block, you specify the actions that will be attempted without errors. These activities will be executed one after another until an exception is encountered, at which point the execution will transfer to the corresponding “Catch” block or the “Finally” block (if defined). Writing activities within the “Try” block allows you to handle exceptions gracefully and implement specific error-handling actions.
Handling Exceptions in the Catch Block
By handling exceptions in the “Catch” block, you define the actions or activities to be executed when specific exceptions occur during the execution of the activities within the “Try” block. This allows you to implement custom error-handling logic and take appropriate actions based on the encountered exceptions.
Example
In this example, I am going to explain TryCatch Activity is simple. For this example, we are going to read an Excel sheet that never existed (No Sheet).
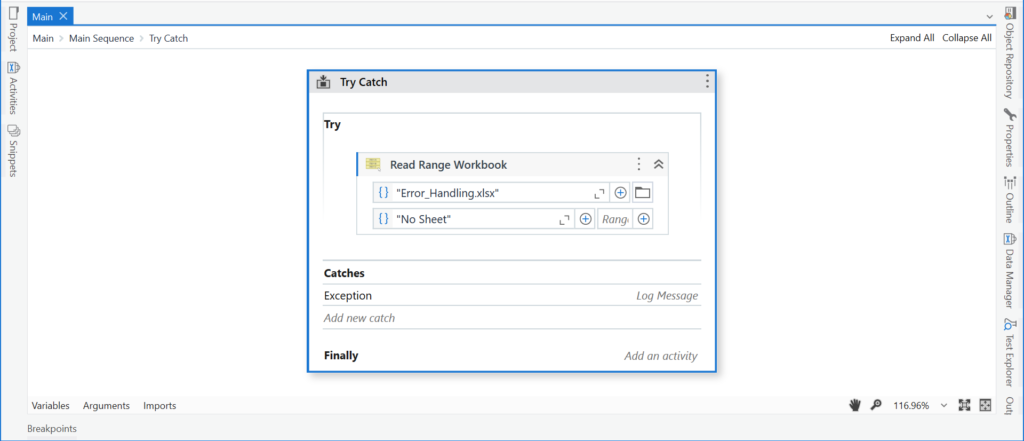
In the Catch block, we used a log message to give info as the error.
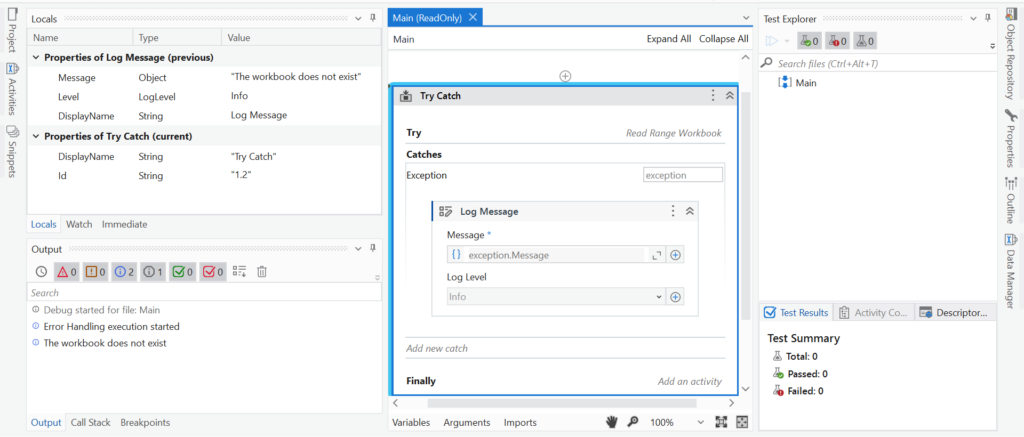
In OutPut Panel, we can see in the Catch block we have handled the exception i.e., The Workbook does not exist, due to the absence of Excel file in the location.
Conclusion
The Try-Catch activity is an essential tool for managing exceptions in UiPath RPA projects. Exceptions can occur at any time and their proper handling can mean the difference for a successful project. By using the Try-Catch activity and following best practices, you can ensure a robust and stable automation process. Don’t forget, proper exception handling is key to the success of your automation projects.
Working with Retry Scope
The Retry Scope will retry the activities a specified number of times within the given interval between retries. It provides a structured way to automatically retry the operation, improving the resilience of your automation solution. If the operation succeeds within the specified number of retries, the workflow will proceed to the next activity after the Retry Scope. If the maximum number of retries is reached and the operation still fails, the workflow will either move to the next activity for error handling or terminate, depending on the design of your workflow.
Working with the Retry Scope is beneficial when dealing with intermittent errors, network issues, or scenarios where you anticipate temporary failures. It simplifies the implementation of retry logic, enhances the reliability of your automation processes, and reduces the need for manual intervention in case of failures.
example :
- Drag and drop the Retry scope activity.
- Enter the properties of retry scope activity like retry no and duration.
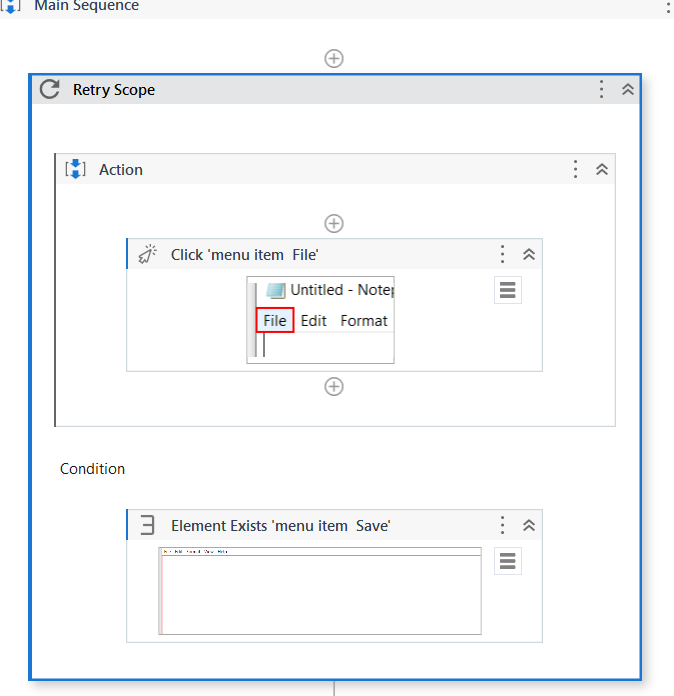
- Darg and drop the click activity and use the notepad application
- Condition area we drag and drop the element exists activity and indicate the screen.


